This is archived documentation for InfluxData product versions that are no longer maintained. For newer documentation, see the latest InfluxData documentation.
| Upgrading from version 1.0 to 1.1 | Upgrading from version 0.7 to 1.1 |
Upgrading from version 1.0 to 1.1.x
The influxd-ctl join command has been renamed to influxd-ctl add-meta. If you have existing scripts that use influxd-ctl join, they will need to use influxd-ctl add-meta or be updated to use the new cluster setup command.
This release should be a drop-in replacement for 1.0 with no data migration required. There are some configuration changes that need to be updated prior to upgrading to avoid downtime. Please review the Changelog prior to upgrading.
Upgrading from version 0.7 to 1.1.x
The following sections include instructions for upgrading from InfluxEnterprise Clustering version 0.7.4 and InfluxEnterprise Web Console version 0.7.1 to InfluxEnterprise 1.1.
Please note that the upgrade process requires you to delete existing users from the web console due to significant changes to how users function in InfluxEnterprise. Once you’ve completed the upgrade process, any users created prior to version 1.1 will be cluster accounts. Please see InfluxEnterprise Users for more information on how InfluxEnterprise organizes users in version 1.1.
Note: Before you start, please review the section at the bottom of this page to ensure that you have the most up-to-date configuration settings.
1. Download and install the new versions of InfluxEnterprise
Meta nodes
Ubuntu & Debian (64-bit)
wget https://dl.influxdata.com/enterprise/releases/influxdb-meta_1.1.5-c1.1.5_amd64.deb
sudo dpkg -i influxdb-meta_1.1.5-c1.1.5_amd64.deb
Note: If you’re running Ubuntu 16.04.1, you may need to enter
sudo systemctl disable influxdb-metabefore executing thedpkgstep.
RedHat & CentOS (64-bit)
wget https://dl.influxdata.com/enterprise/releases/influxdb-meta-1.1.5_c1.1.5.x86_64.rpm
sudo yum localinstall influxdb-meta-1.1.5_c1.1.5.x86_64.rpm
Data nodes
Ubuntu & Debian (64-bit)
wget https://dl.influxdata.com/enterprise/releases/influxdb-data_1.1.5-c1.1.5_amd64.deb
sudo dpkg -i influxdb-data_1.1.5-c1.1.5_amd64.deb
RedHat & CentOS (64-bit)
wget https://dl.influxdata.com/enterprise/releases/influxdb-data-1.1.5_c1.1.5.x86_64.rpm
sudo yum localinstall influxdb-data-1.1.5_c1.1.5.x86_64.rpm
Web console
Ubuntu & Debian (64-bit)
wget https://s3.amazonaws.com/influx-enterprise/releases/influx-enterprise_1.1.1_amd64.deb
sudo dpkg -i influx-enterprise_1.1.1_amd64.deb
RedHat & CentOS (64-bit)
wget https://s3.amazonaws.com/influx-enterprise/releases/influx-enterprise-1.1.1.x86_64.rpm
sudo yum localinstall influx-enterprise-1.1.1.x86_64.rpm
Note: If you’re running Ubuntu 16.04.1, you may need to enter
sudo systemctl disable influx-enterprisebefore executing thedpkgstep.
2. Delete existing Web Console users
The new user organization in InfluxEnterprise requires those looking to upgrade to version 1.1 to remove all existing users from the Web Console. On the server that’s running InfluxEnterprise, enter:
rm -rf /var/lib/influx-enterprise/enterprise.db
3. Migrate the Web Console configuration file
Run the following command:
sudo -u influx-enterprise influx-enterprise migrate --config /etc/influx-enterprise/influx-enterprise.conf
4. Restart all services
Meta nodes:
On sysvinit systems, enter:
service influxdb-meta start
On systemd systems, enter:
sudo systemctl start influxdb-meta
Data nodes:
On sysvinit systems, enter:
service influxdb start
On systemd systems, enter:
sudo systemctl start influxdb
Web console:
On sysvinit systems, enter:
service influx-enterprise start
On systemd systems, enter:
sudo systemctl start influx-enterprise
5. Complete the signup flow
Now that you’ve upgraded to version 1.1, visit http://<your_web_console_server's_IP_address>:3000
to complete the new signup flow.
The Getting Started guide offers detailed instructions for how to complete the signup process. Don’t worry about any existing cluster users for now - we’ll take care of them in the next step.
6. Link existing cluster accounts to web console users
In version 1.1 web console users are given cluster-specific permissions by being associated with a separate cluster account. The upgrade process turned all existing users into cluster accounts with no associated web console user. The following steps document how to link those existing cluster accounts to web console users.
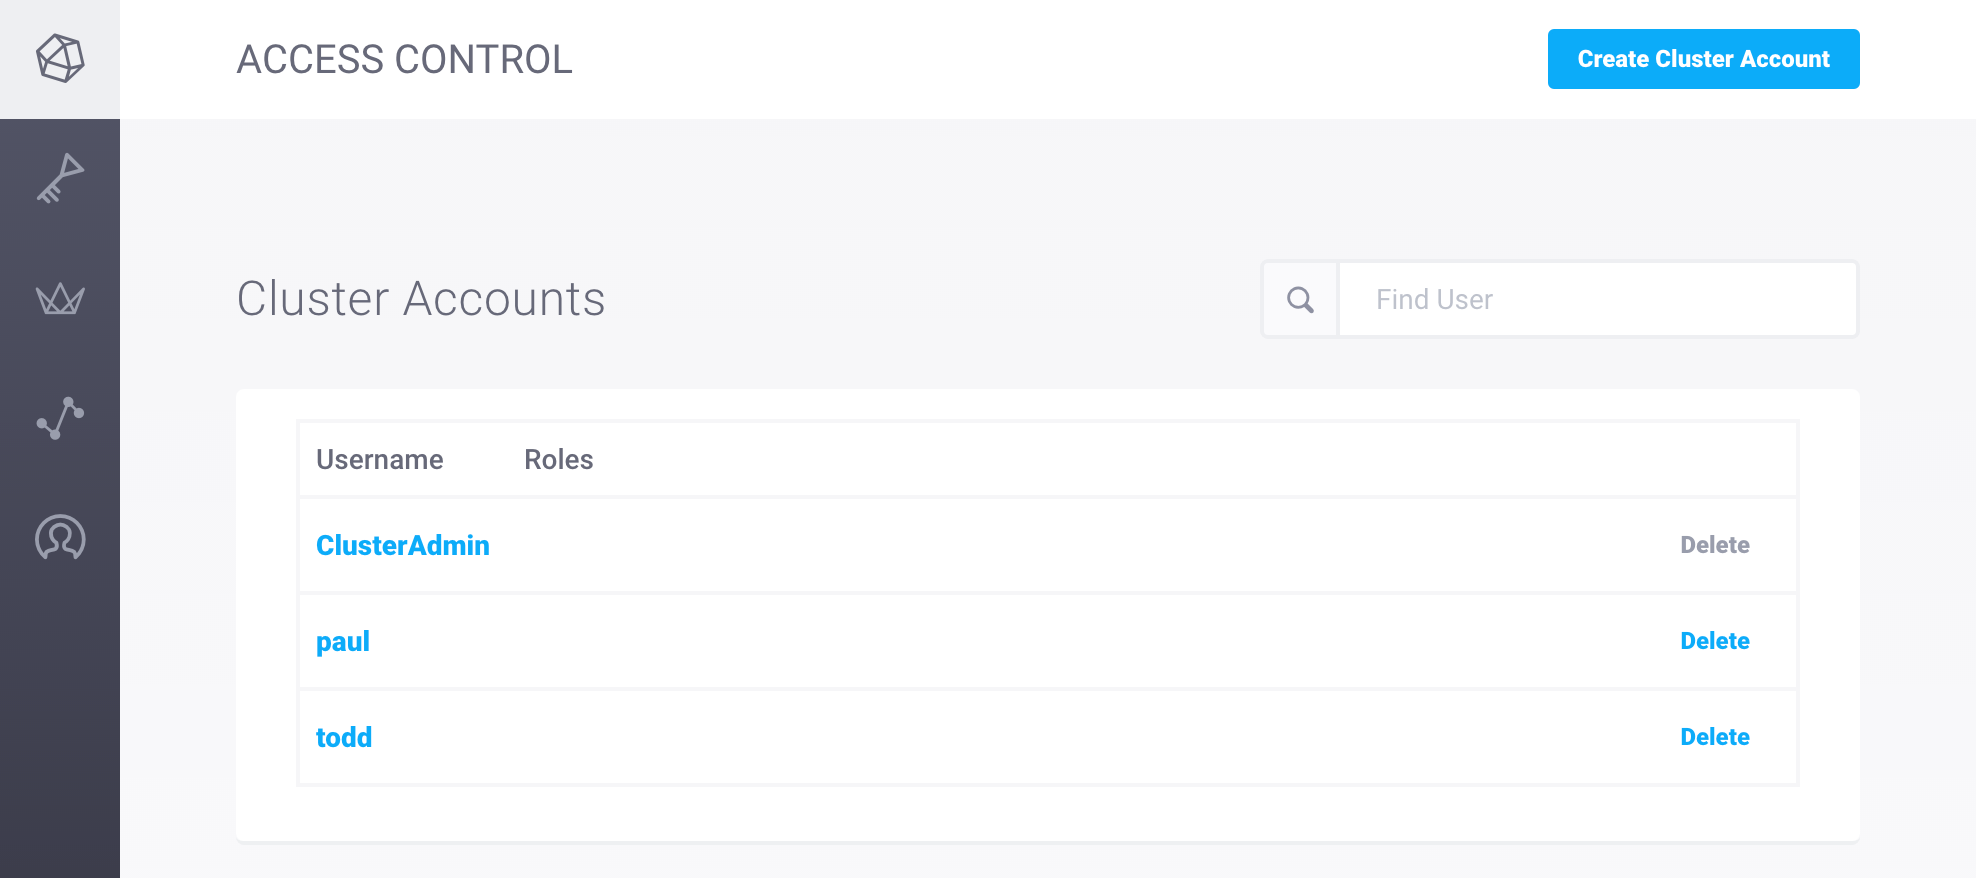
First, view existing cluster accounts to identify the users you’ll need
to invite to the web console.
To view your existing cluster accounts, visit the Cluster Accounts page located
in the CLUSTER section in the sidebar.
The example below shows three cluster accounts.
The first account (ClusterAdmin) is the account we created in the new signup flow.
The last two (paul and todd) are users that existed prior to the
upgrade.
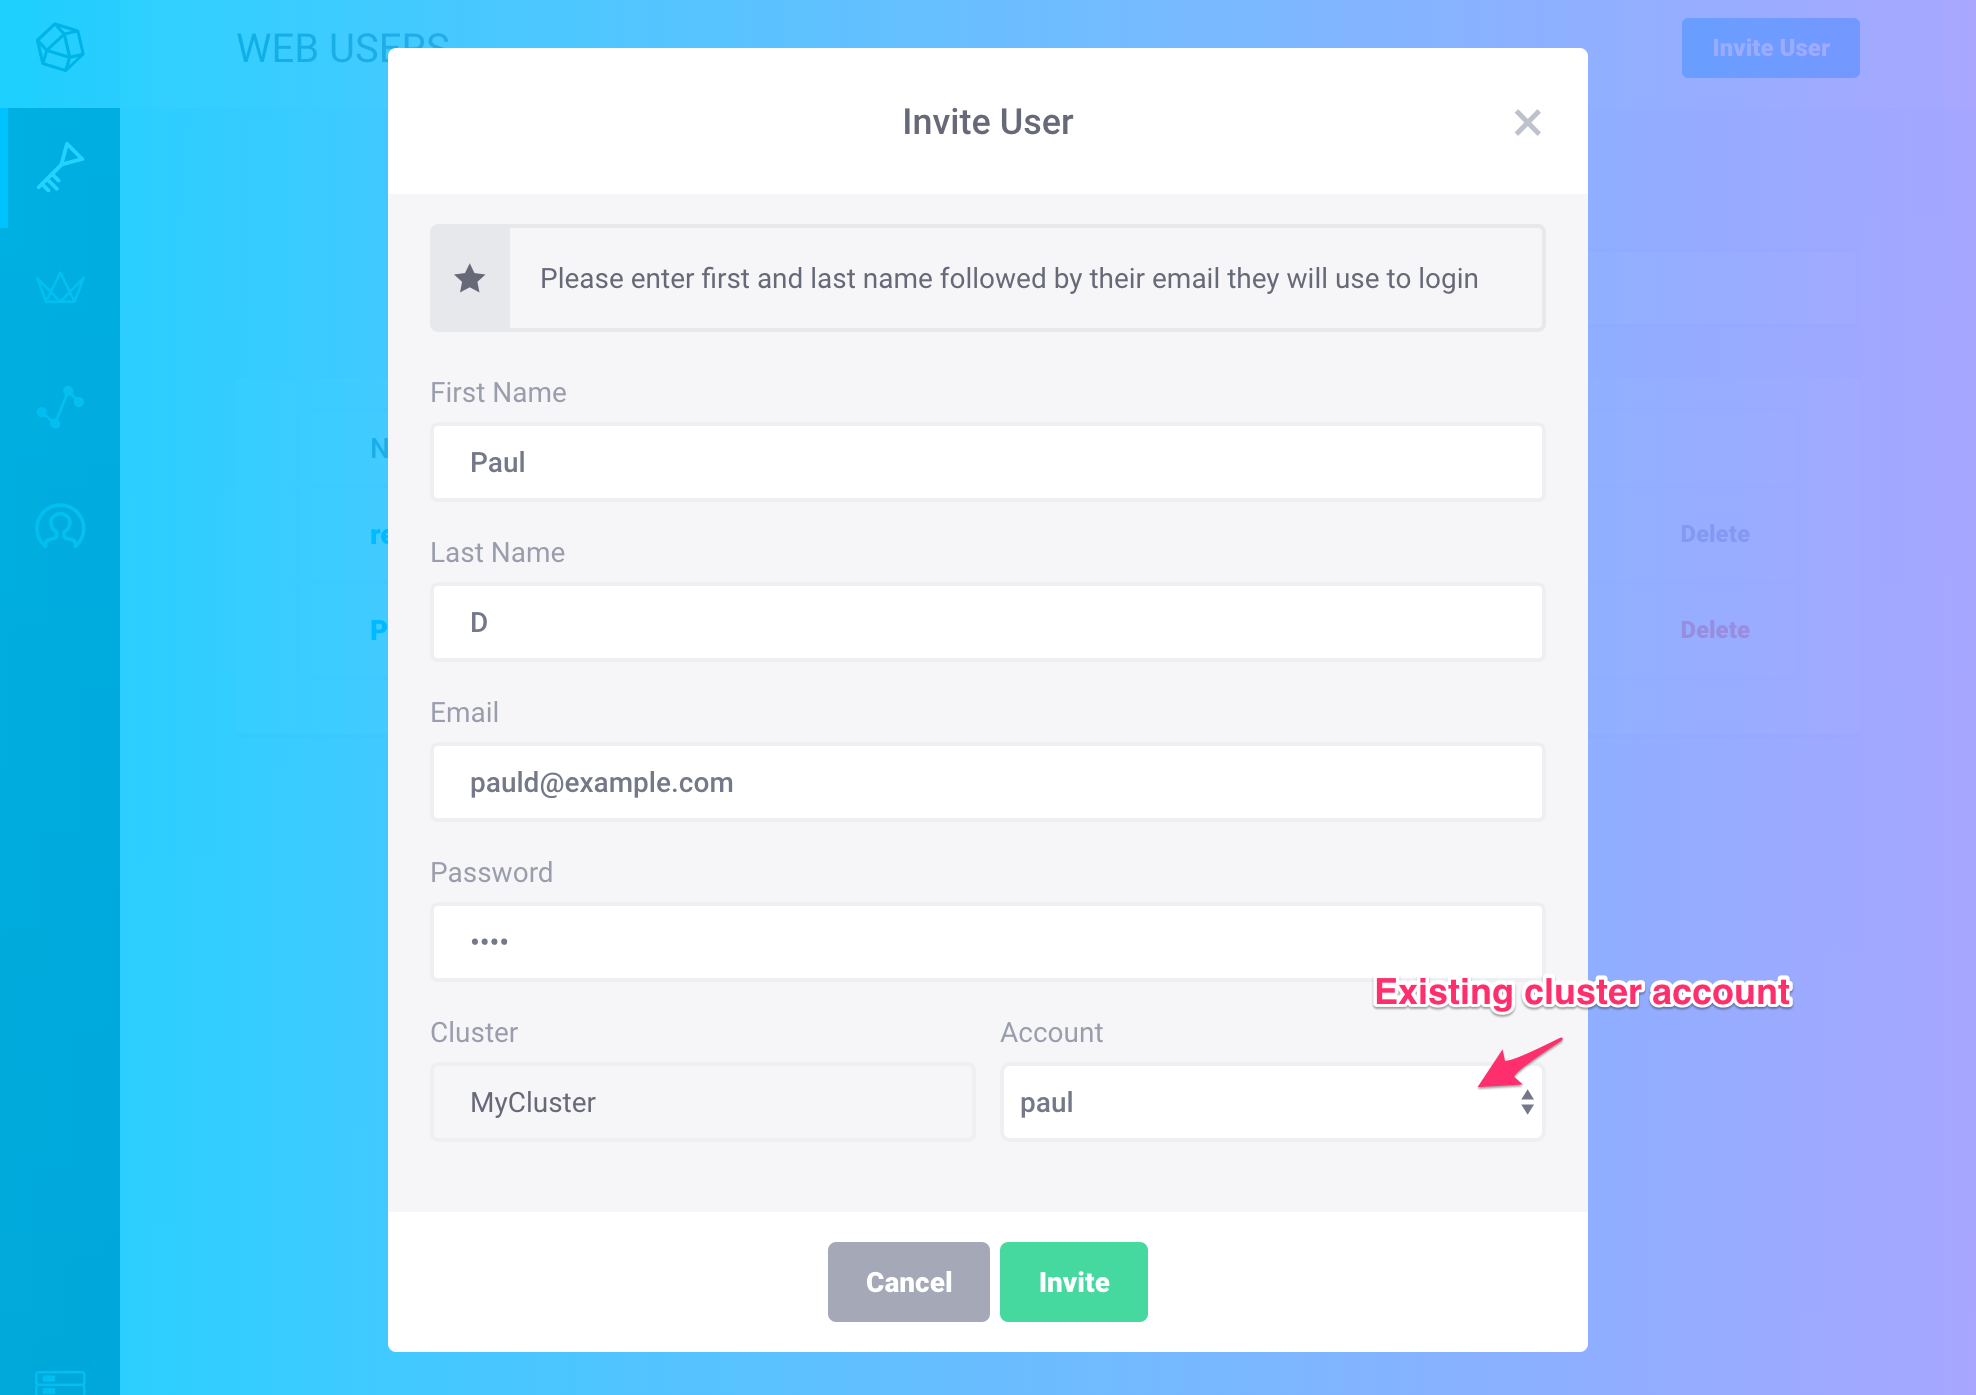
Next, invite the cluster account users that existed prior to the upgrade to be web console users.
Visit the Users page located in the WEB ADMIN section in the sidebar, and
click on the Invite User button in the top right corner.
Once you’ve filled out the Invite User form with the relevant information, link the new
web console user with the existing cluster account by selecting the relevant
cluster account from the Account dropdown.
The example below shows a web console invite for the user Paul.
The last input links the new web console user Paul with the existing cluster
account paul.
Repeat this process for each cluster account user that existed prior to the upgrade. Once you’ve completed this step, all pre-existing cluster accounts will be linked to web console users and those users will have access to both the cluster and the web console.
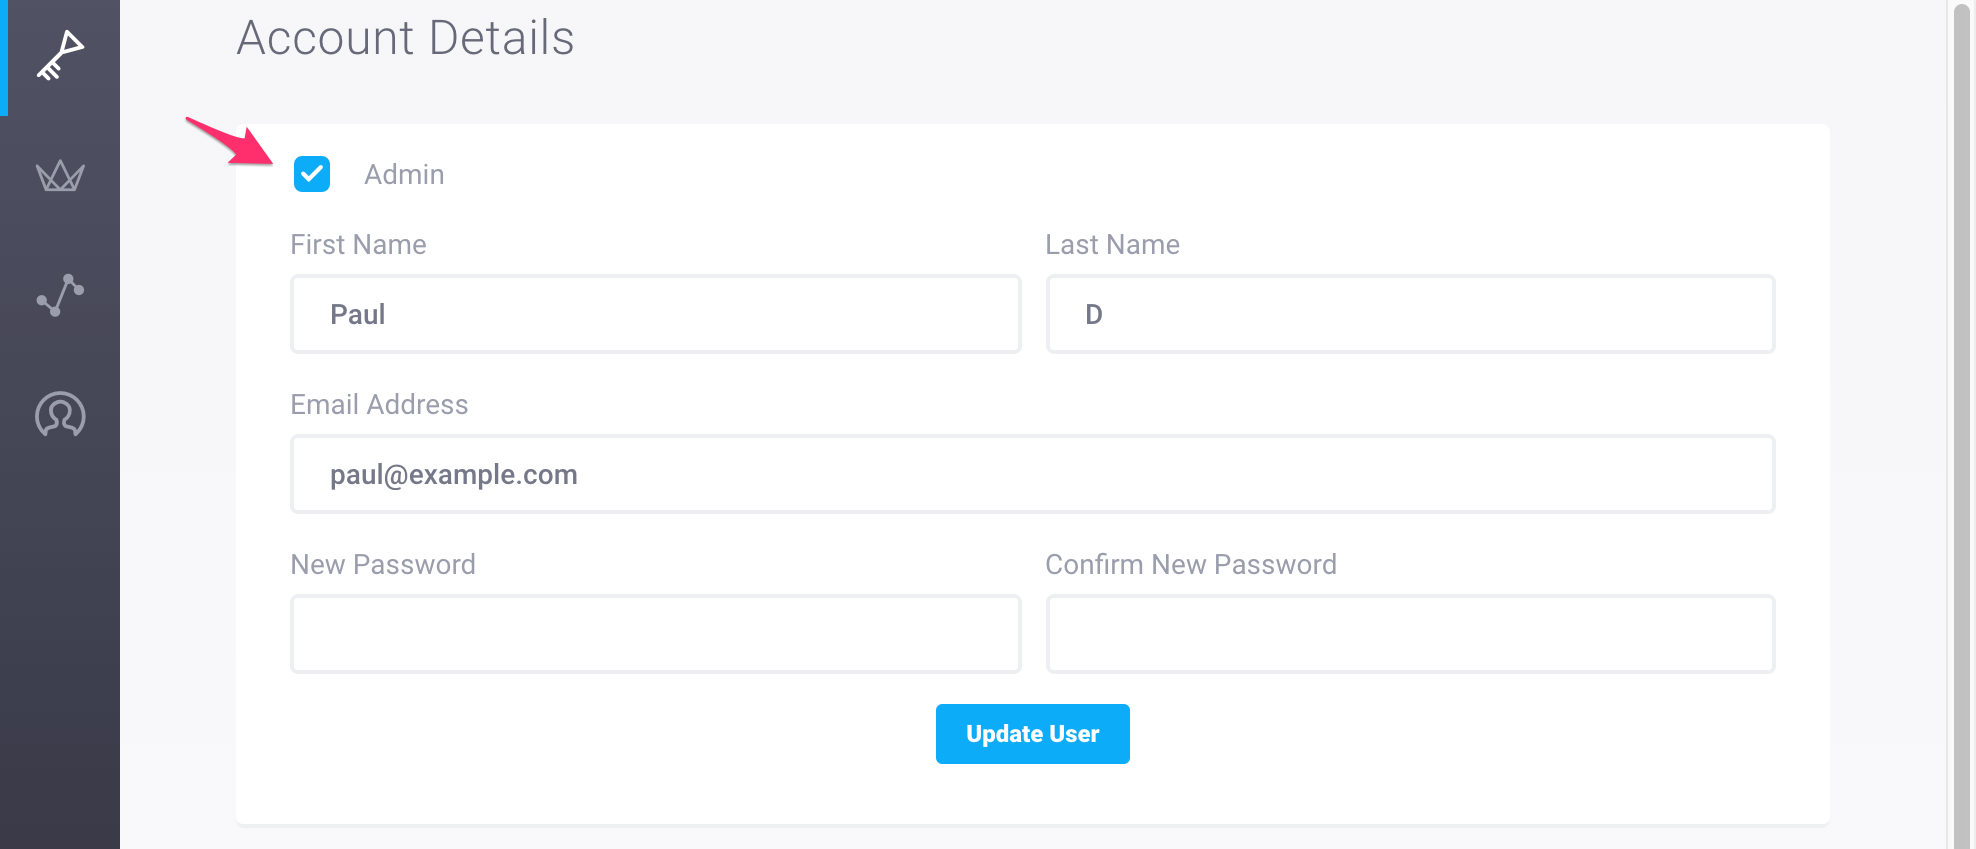
Note: Web console users can be admin users or non-admin users. In addition to having access to the web console, admin users are able to invite users, manage web console users, manage cluster accounts, and edit cluster names.
By default, new web console users are non-admin users. To make a web console user an admin user, visit the
Userspage located in theWEB ADMINsection in the sidebar and click on the name of the relevant user. In theAccount Detailssection, click the checkbox next toAdminand clickUpdate User.
You’ve completed the upgrade process for version 1.1. Next, check out the release notes to see what’s new!
Configuration settings
In older versions of InfluxEnterprise, configuration settings ensured that the Web Console registered with the Cluster. Those settings are no longer supported. If you’re working with InfluxEnterprise versions 0.7.2 and up, please be sure to update your configuration settings as outlined below. The updated settings ensure that the Cluster registers with the Web Console.
In each meta node’s configuration file (/etc/influxdb/influxdb-meta.conf), set:
registration-enabledtotrueregistration-server-urlto the hostname of the InfluxEnterprise Web Consolereporting-disabled = false bind-address = "" hostname = "enterprise-meta-01" [enterprise] registration-enabled = true # Set to 'true' registration-server-url = "http://<web_console_hostname>:3000" # Enter web console hostname [...]
Next, remove the entire [[meta]] section from the Web Console configuration file (/etc/influx-enterprise/influx-enterprise.conf):
url = "http://<your_server's_IP_address>:3000"

hostname = "localhost"
port = "3000"

[...]

❌[[meta]]❌
❌urls = ["<meta_server_IP_address_1>:8091","<meta_server_IP_address_2>:8091","<meta_server_IP_address_3>:8091"]❌

[...]