This is archived documentation for InfluxData product versions that are no longer maintained. For newer documentation, see the latest InfluxData documentation.
Now that you successfully installed and set up InfluxEnterprise, visit
http://<your_web_console_server's_IP_address>:3000 to get started with the
web console!
When you first visit the web console, it prompts you to:
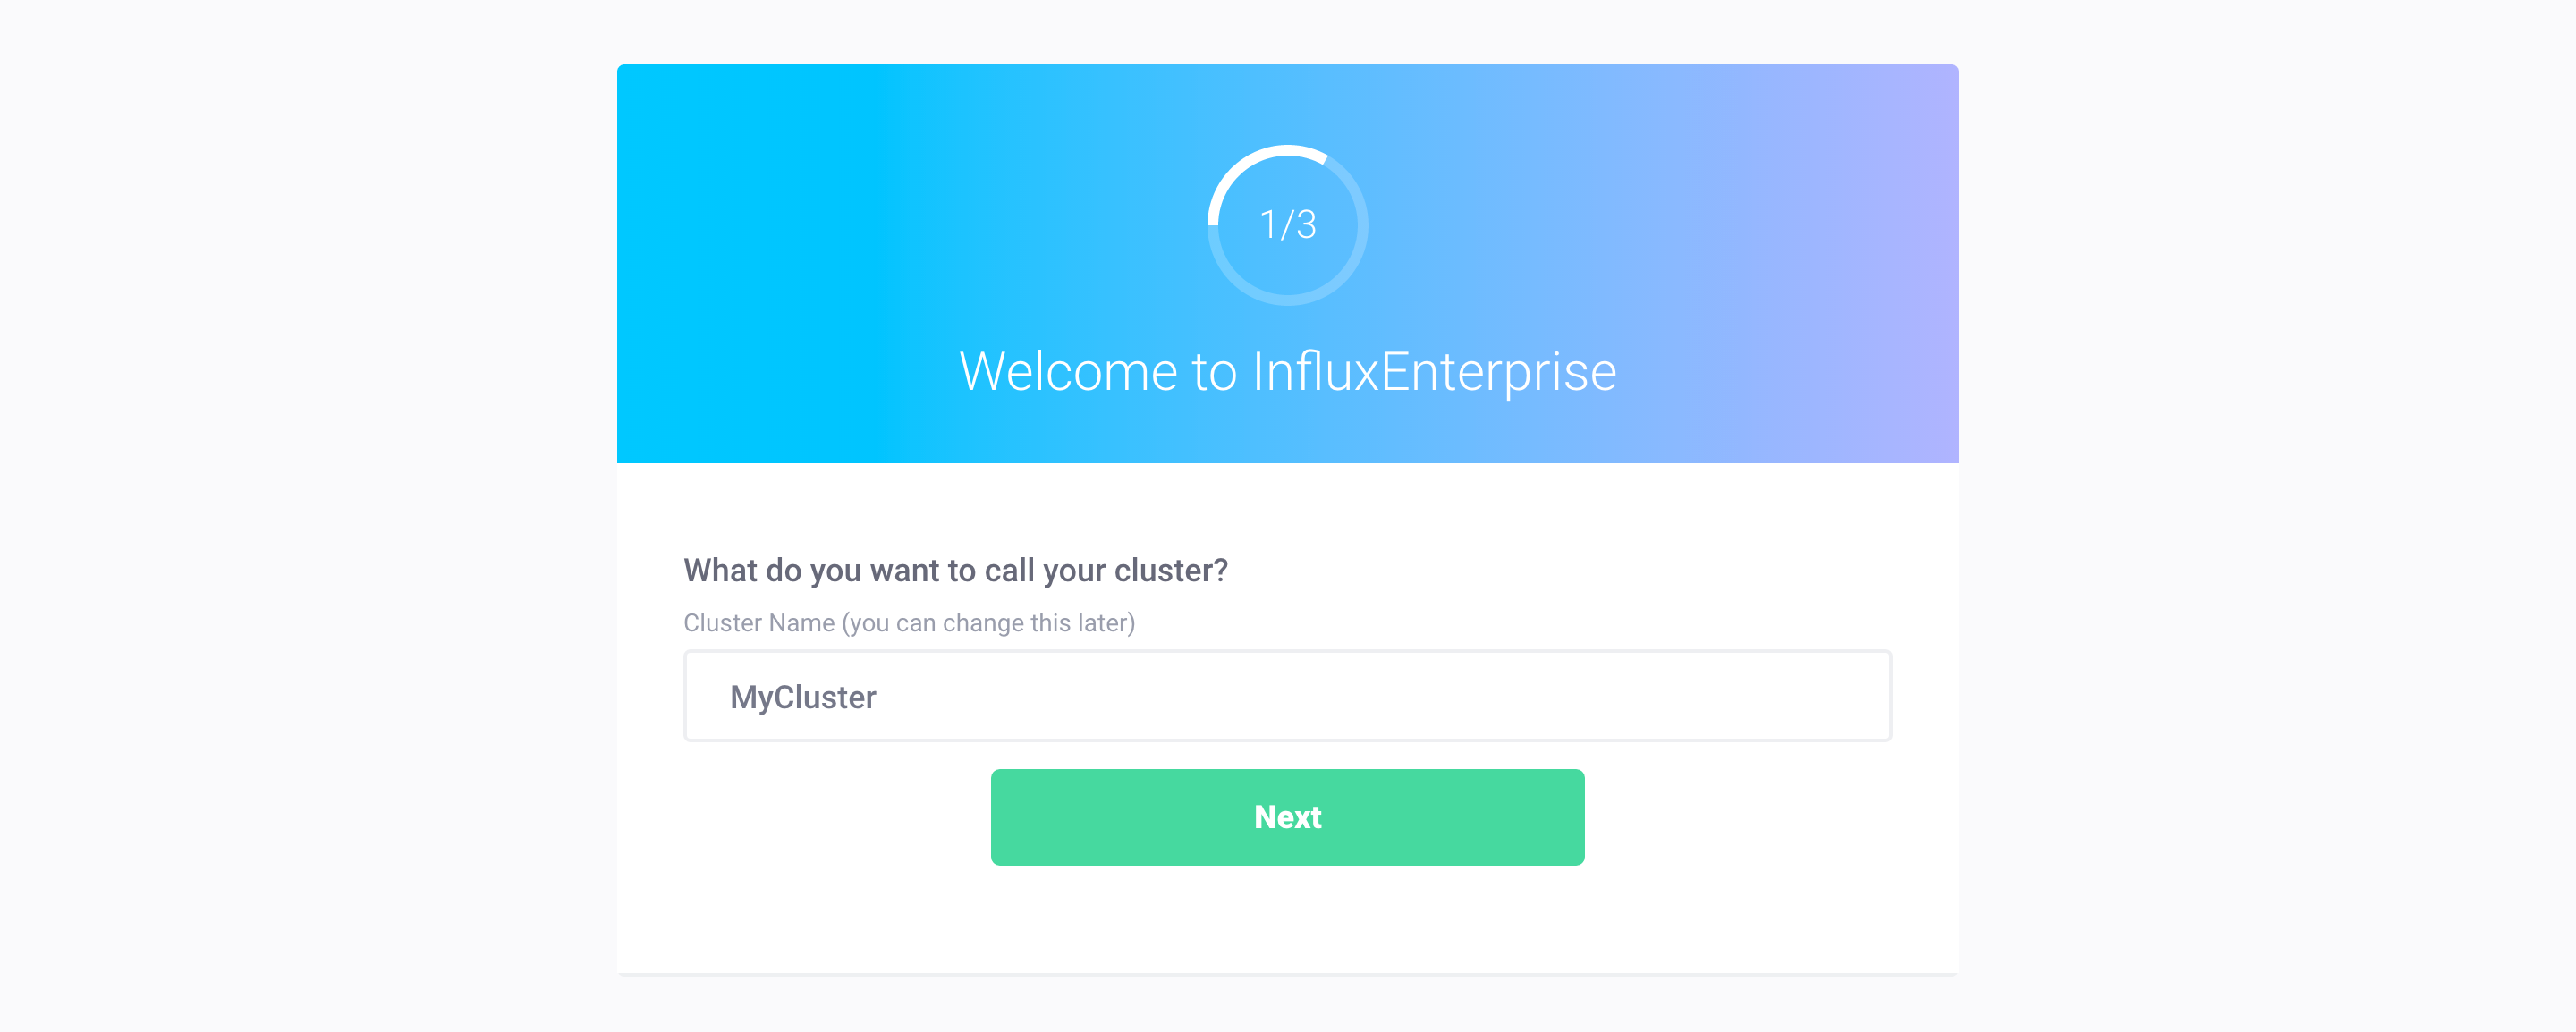
1. Name your cluster
The first step is to name the cluster that you setup in the
previous documents.
Here, we call our cluster MyCluster.
Note: If instead you see a message that your cluster does not appear to be set up, double-check the
registration-enabledandregistration-server-urlsettings in the configuration files for each meta node. Theregistration-server-urlsetting must be a full URL with protocol and port.
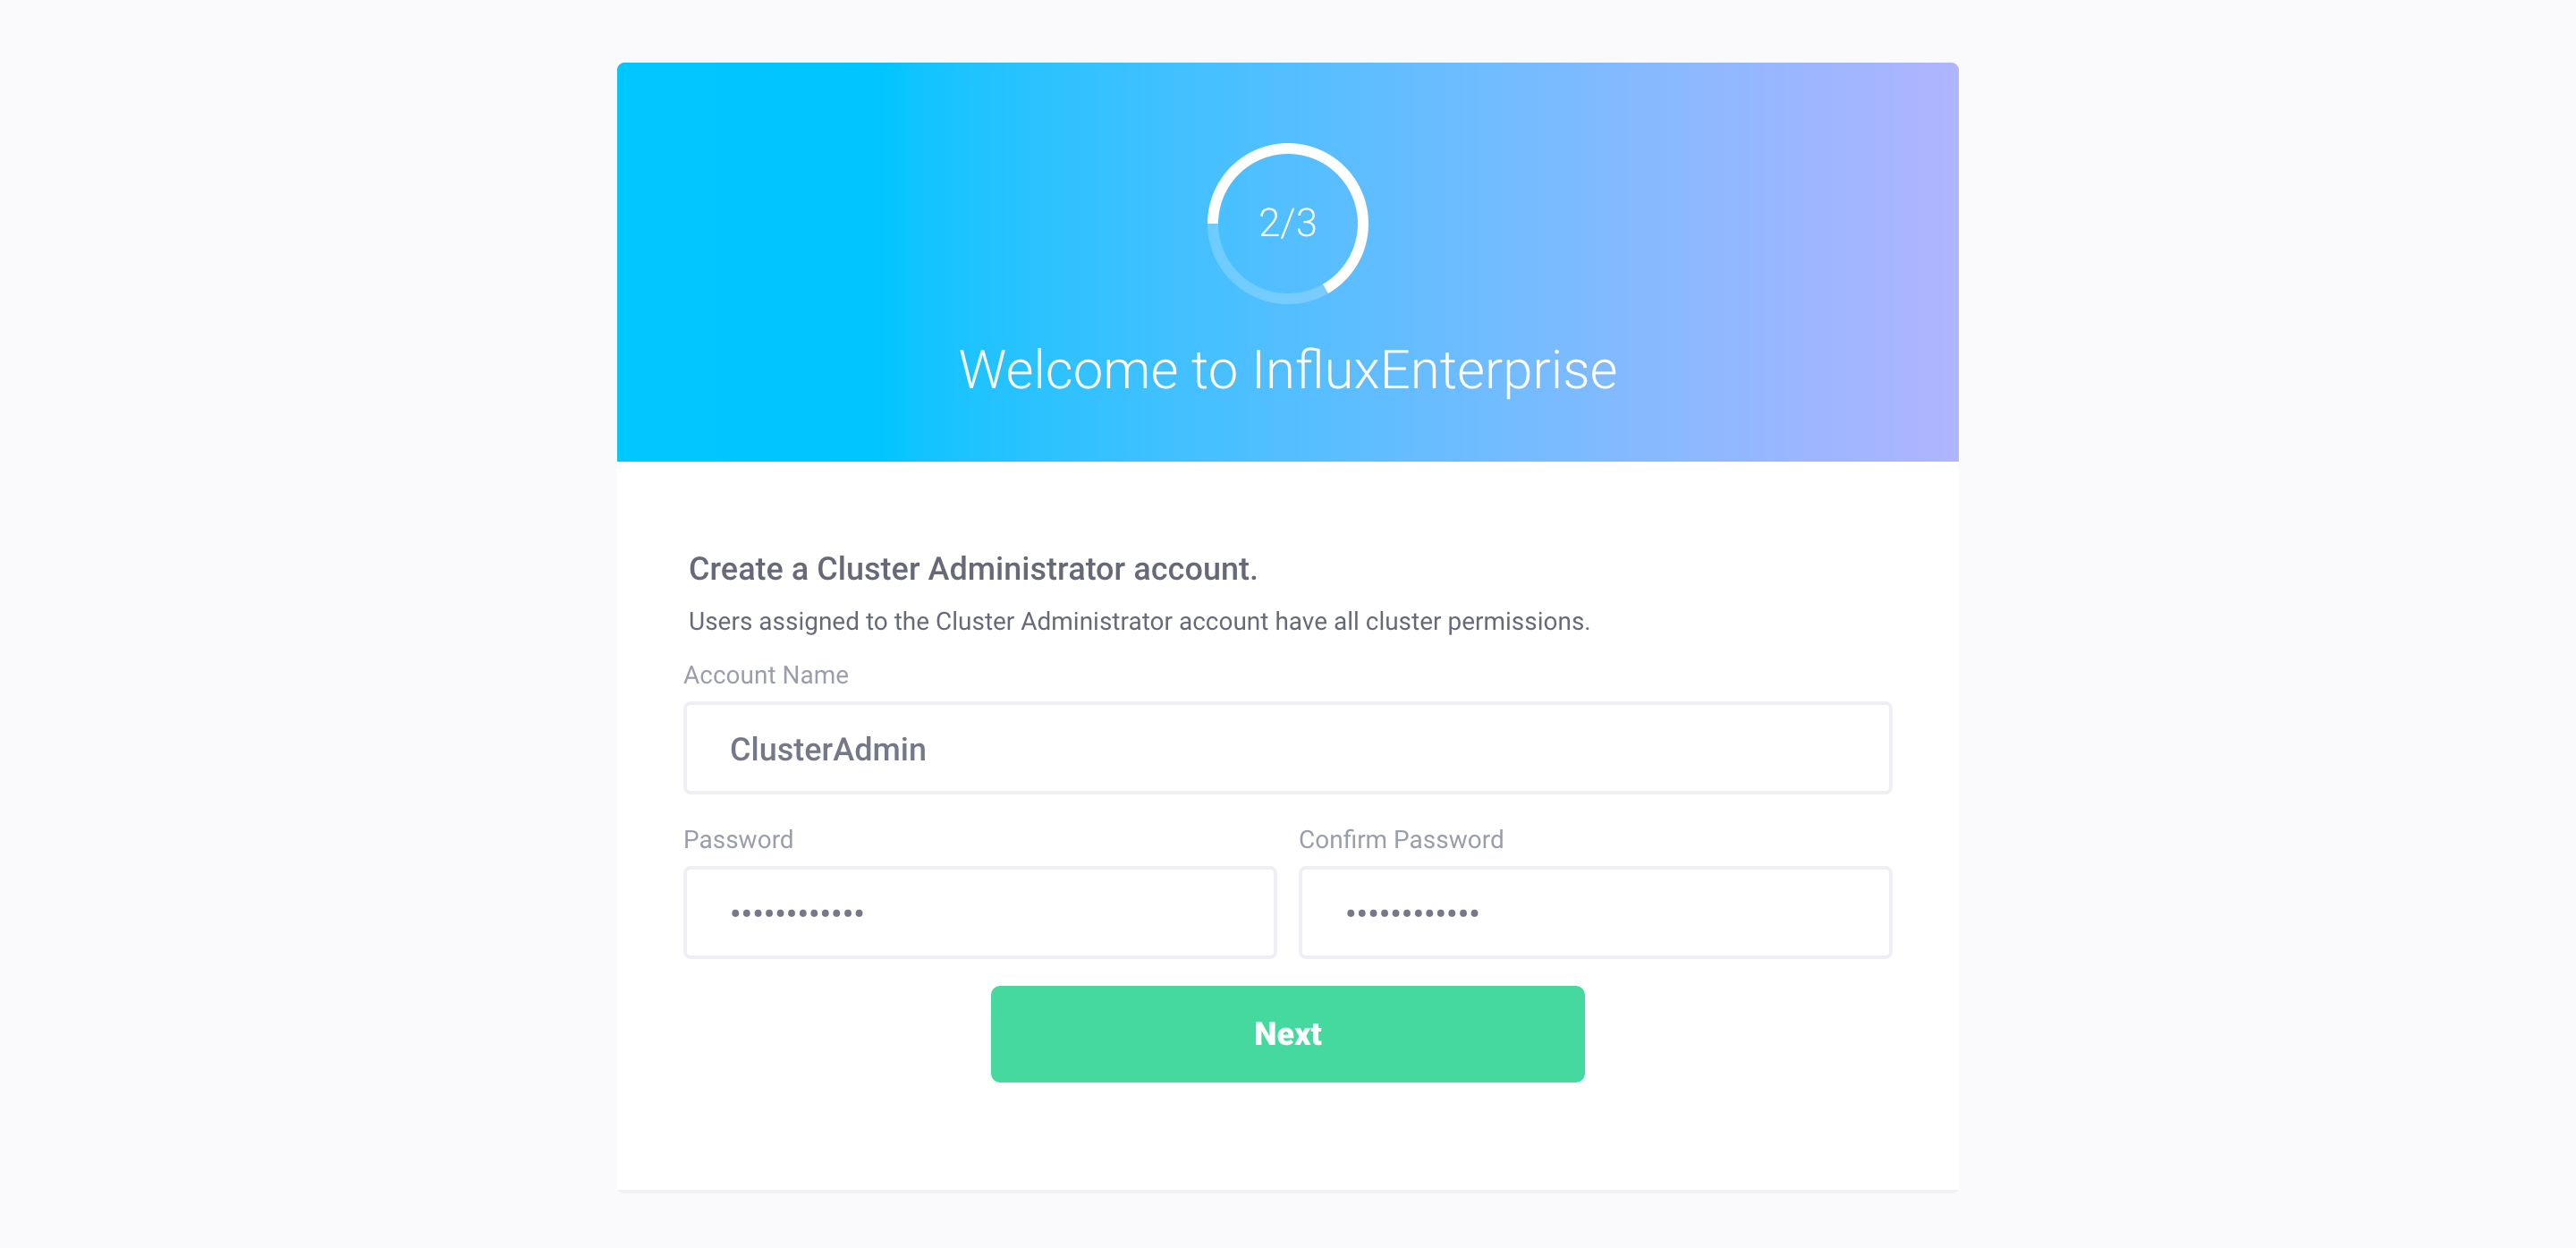
2. Create a Cluster Admin account
Next, create a Cluster Admin account. The Cluster Admin account has all cluster-specific permissions.
We recommend calling this account ClusterAdmin.
Note that you will need to authenticate with the ClusterAdmin username and
password if you’re interacting with your InfluxEnterprise cluster outside of the
web console.
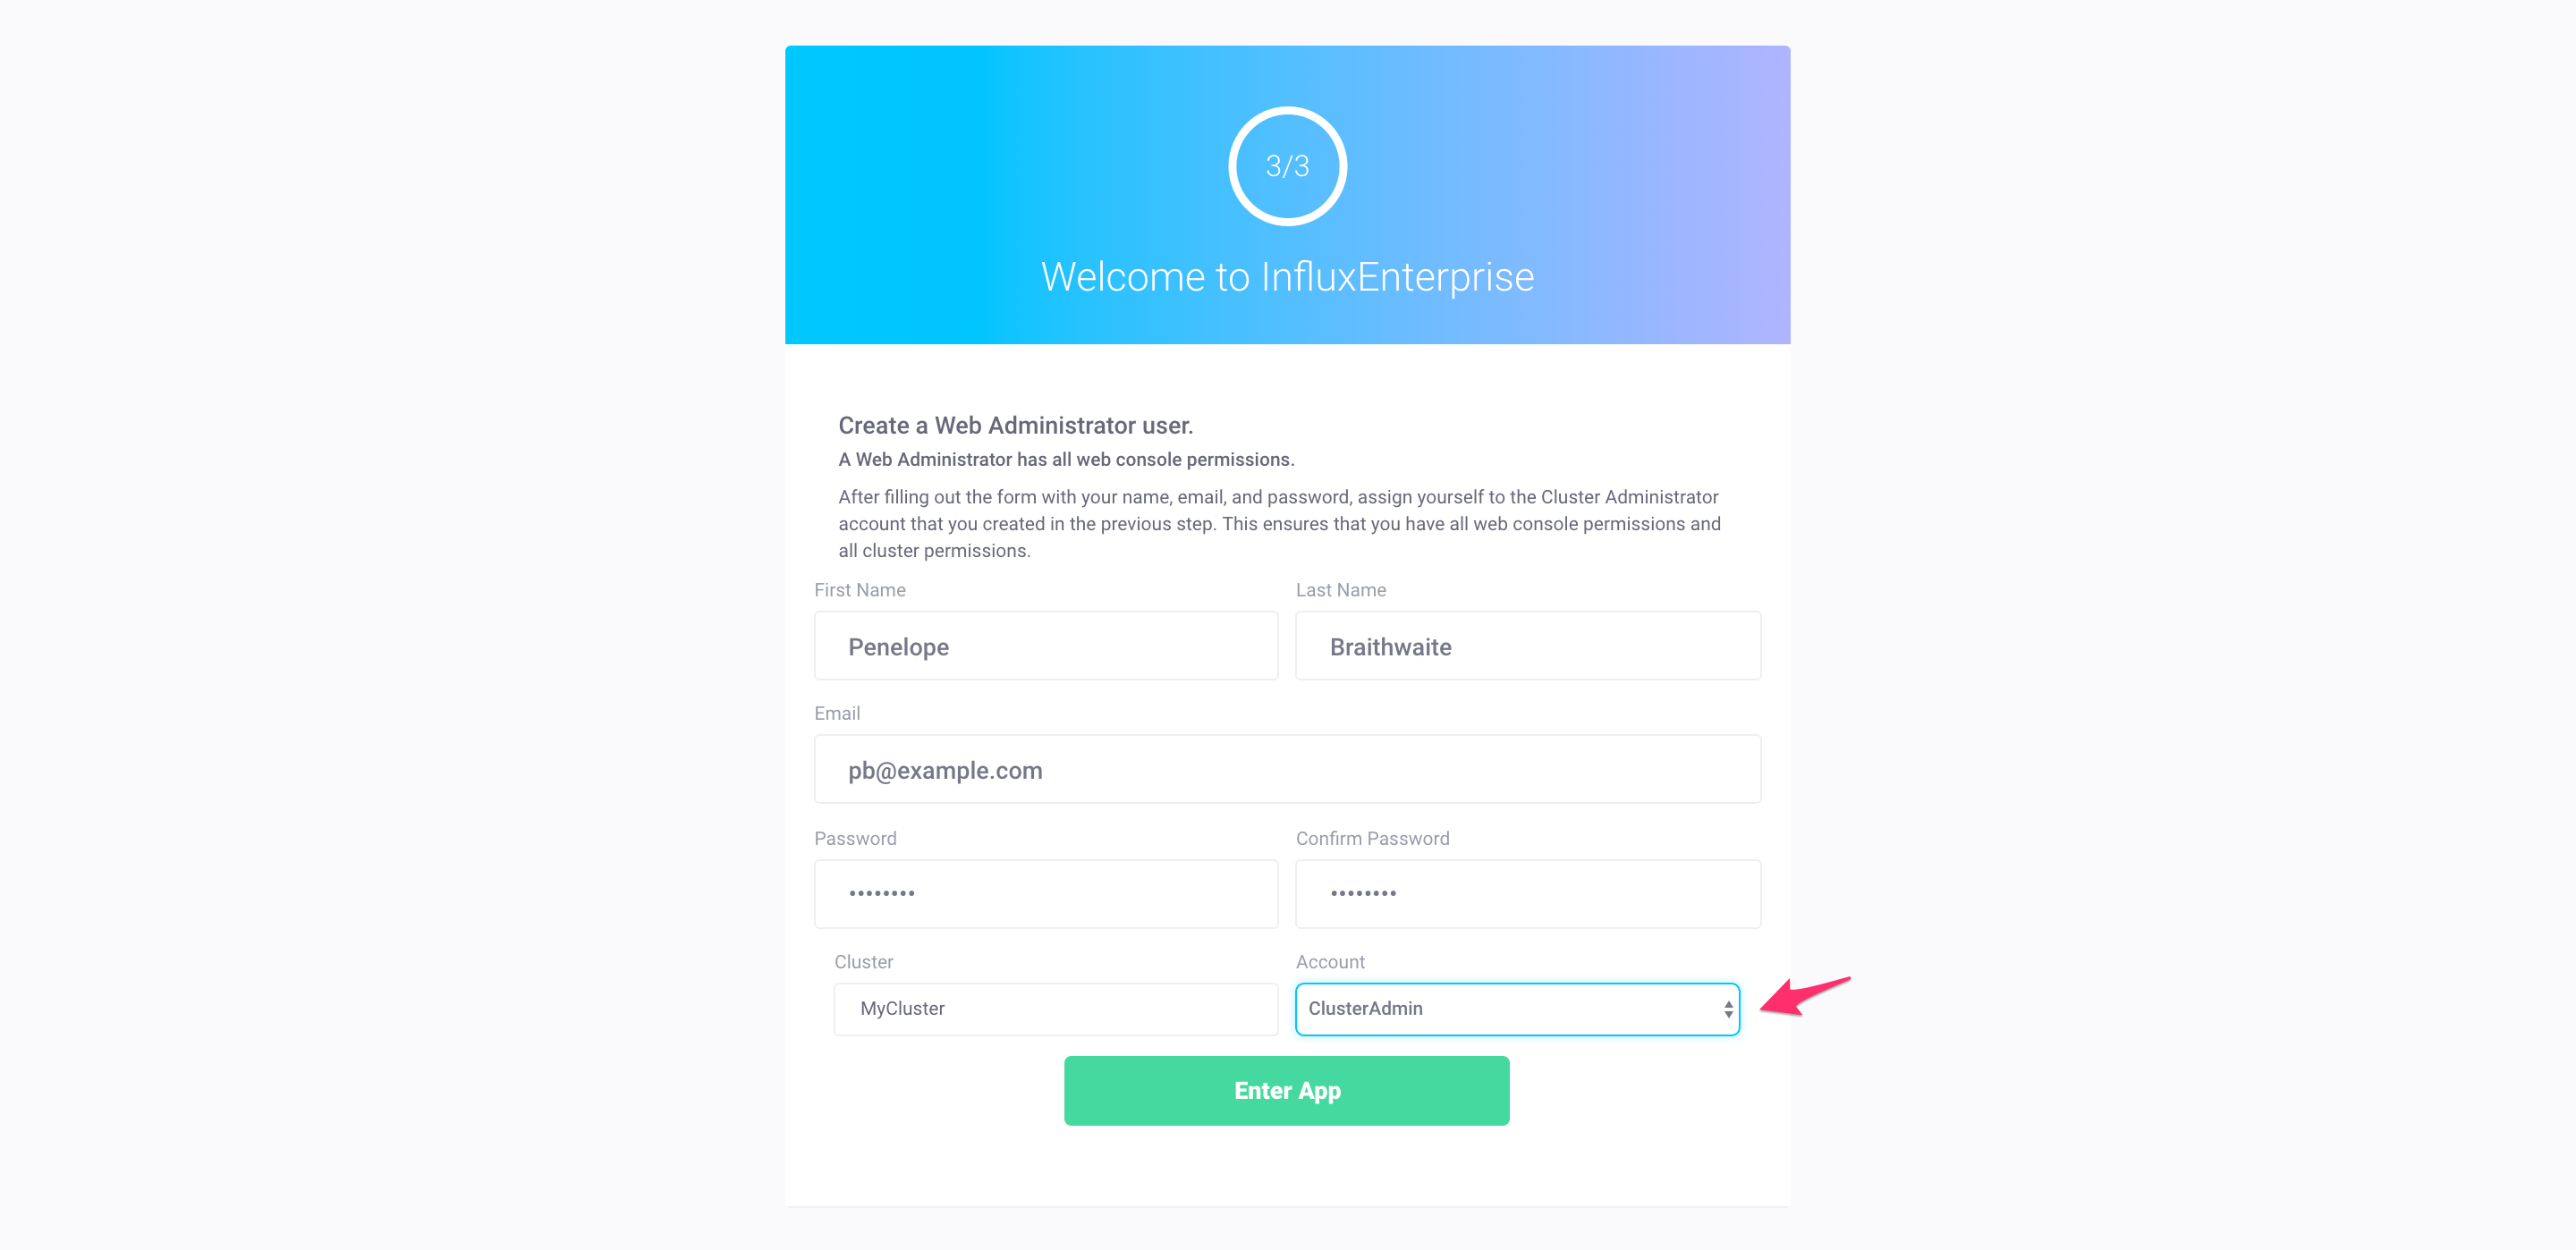
3. Create a Web Admin user
The Web Admin user has all web-console-specific permissions.
Fill out the form with the Web Admin user’s first and last name, associated email address, and password.
Important: Associate the Web Admin user with the Cluster Admin (we used
ClusterAdminandMyClusterin the examples above). To associate the Cluster Admin with Web Admin, chooseClusterAdminin the menu adjacent toMyCluster.Associating the two accounts with one another ensures both admin accounts have all web console permissions AND all cluster-specific permissions.
Where to from here?
Check out the Features section to see all that InfluxEnterprise can do.
Note that the web console requires a functioning SMTP server to email invites to new web console users. If you’re working on Ubuntu 14.04 and are looking for an SMTP server to use for development purposes, see the SMTP Server Setup guide for how to get up and running with MailCatcher.